Hi,
now that I'm a proud owner of a new choke/cruise control assembly (thanks Solowings for their brilliant service)!, the next step is to do the job.
At the first glance it looks like best is to undo the cables on the carb, pull them all the way out, inspect and if not frays, etc. feed them into the new handles and feed them through the outer cable and ensure butterflies open/close fully. There's gotta be a catch though, because a single handle has to operate two carbs. (Most of my related experiences come from working on my old Land Rovers and never had one with dual carbs ...)
Are there any things I should watch out for? Any tips, tricks?
Thanks!
Cheers,
V.
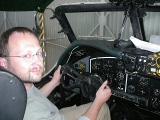
Replacing choke and hand throttle handles on Windlass 503 DC

Re: Replacing choke and hand throttle handles on Windlass 503 DC
Cables don't go directly from the throttle control and choke to the carbs. Follow the cables from the carbs and you will find they go into a cylyndrical tube which allows the split between hand and foot throttle and single cable from choke to split to two chokes. Your new cables will go from the hand controls to the two splitters.
Aviate Raptor
-
V
- Whats the right frequency?

- Posts: 293
- Joined: Tue Oct 04, 2005 6:29 pm
- Location: Diemerskraal, Paarl
Re: Replacing choke and hand throttle handles on Windlass 503 DC
Right, thanks, saw the tubes and the cables going in and out - two cables in, two out. Makes sense now, one input is from the foot-throttle and another from the cruise control. The choke one should have one cable in and two out.
So basically I just have to open up these tubes somehow, feed the cable out, into the new handles and everything goes back in. Is there a trick with these tubes or anything else I should watch out for?
Thanks!
Cheers,
V.
So basically I just have to open up these tubes somehow, feed the cable out, into the new handles and everything goes back in. Is there a trick with these tubes or anything else I should watch out for?
Thanks!
Cheers,
V.
-
kloot piloot
- Frequent Flyer

- Posts: 1499
- Joined: Thu Jan 10, 2008 10:37 pm
- Location: Sky @ FABS (Brits Flying Club)
- Contact:
Re: Replacing choke and hand throttle handles on Windlass 503 DC
I am watching this space in anticipation ! Also got my new cable set from Solowings 2 years ago. Still in my hangar, yet not installed. It is more complicated than meets the eye, maybe 3 - 4 hours ? Hence my postponement !
From my re-collection i requires a lot of stripping in the carburator area.
Any easy solutions will be welcomed.
Untill then, I will have to do with 1 frayed cable strand near my choke lever.
From my re-collection i requires a lot of stripping in the carburator area.
Any easy solutions will be welcomed.
Untill then, I will have to do with 1 frayed cable strand near my choke lever.
Roel Jansen
Never say: "I should have ..."
ZU-IAR powered by BMW 1200
Never say: "I should have ..."
ZU-IAR powered by BMW 1200
-
V
- Whats the right frequency?
- Posts: 293
- Joined: Tue Oct 04, 2005 6:29 pm
- Location: Diemerskraal, Paarl
Re: Replacing choke and hand throttle handles on Windlass 503 DC
Hi Kloot Pilot,
I'm definitely going to tackle this job this weekend. I have a broken choke handle and it is not fun starting the 503 without using the choke ... Will try to document and post my experiences ...
Cheers,
V.
I'm definitely going to tackle this job this weekend. I have a broken choke handle and it is not fun starting the 503 without using the choke ... Will try to document and post my experiences ...
Cheers,
V.
-
V
- Whats the right frequency?
- Posts: 293
- Joined: Tue Oct 04, 2005 6:29 pm
- Location: Diemerskraal, Paarl
Re: Replacing choke and hand throttle handles on Windlass 503 DC
So far my experiences:
It doesn't seem to be worth opening up the junction boxes (tubes), unless replacing cables. The cable ends inside are clearly not meant for disassembling.
Since I just needed to replace the hand choke/cruise control assembly and not the cable itself, I elected to leave the junction tubes alone, remove the cable stops on the handle side, replace the handle and put on new stops. The old stops were soft copper/brass and could be filed away with a little bit of vigour. (My two most essential tools on Land Rovers: vise-grips and a Leatherman worked like a charm
After the stops are removed, of course, the end of the cable will start fraying immediately, making it feeding through the tiny (2mm) hole at the base of the new handle an absolute mission. I ended up drilling it up to 2.5 and eventually 3mm. There is still plenty of metal to keep the handle's structural integrity and the cable fits snugly too.
Naturally I didn't have any of those crimp-on cable stops with me to finish the job and will have to take another trip to the bicycle shops next week.
Cheers,
V.
Who is online
Users browsing this forum: No registered users and 6 guests