

As you know I’m busy overhauling my 503, see my other thread about the engine teardown and inspection.
Below is my teardown of the carbs and fuel pump, some interesting finds after 435Hours of operation.
If you are going to do this go to this linkthat Morph provided and read everything about the process.
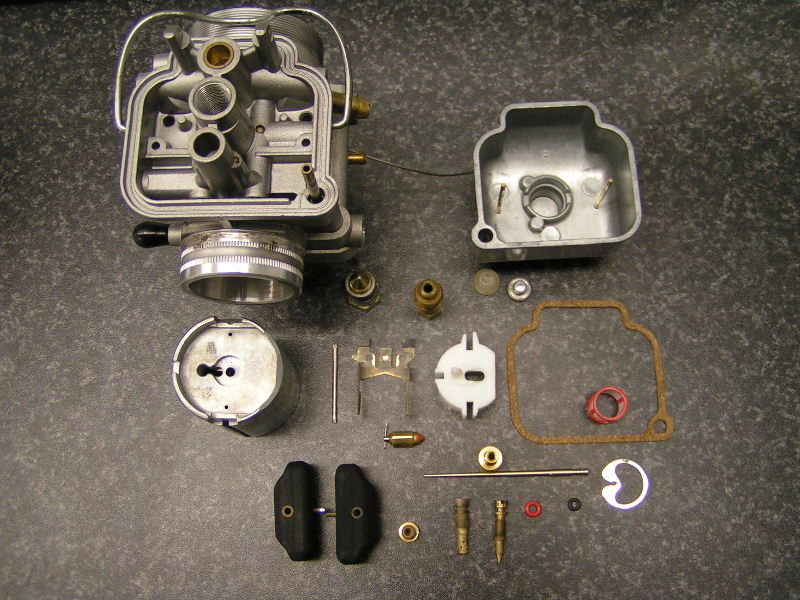
First strip the carbs into all its small portions, and clean it and blow out all the passages with compressed air. Here's all the parts.
My carb must have been assembled before the Rotax service bulletin about the O-ring on top of the needle valve. I was shocked and surprised to see the amount of wear and tear on the old needle (bottom) compared to new (top). One can clearly see the wearing and there is a very definitive shoulder on the needle now, the 11K2 numbering is completely gone only the ‘1’ remain.
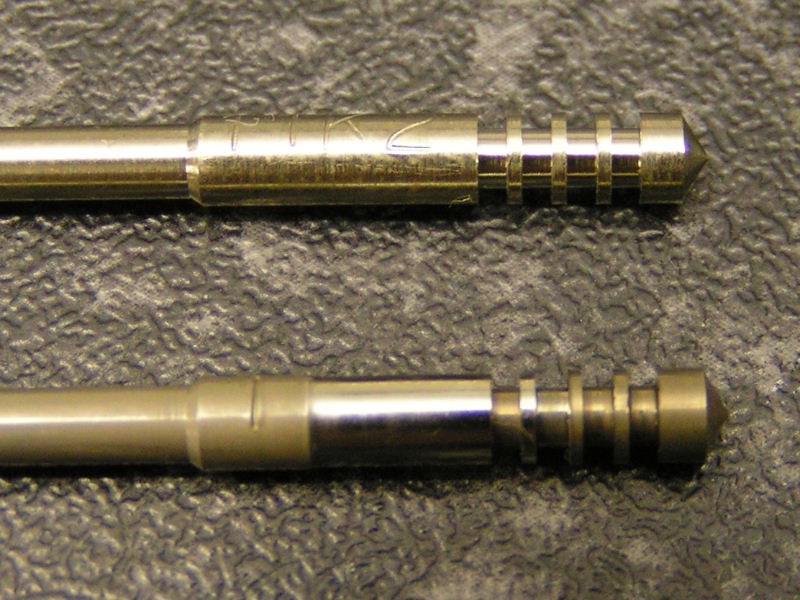
With that amount of wear on the shoulder I can just imagine how much the needle and jet needle must be oversized now, since they slide into each other. If they are worn out it means too much fuel goes to the engine, leading to carboning up etc…
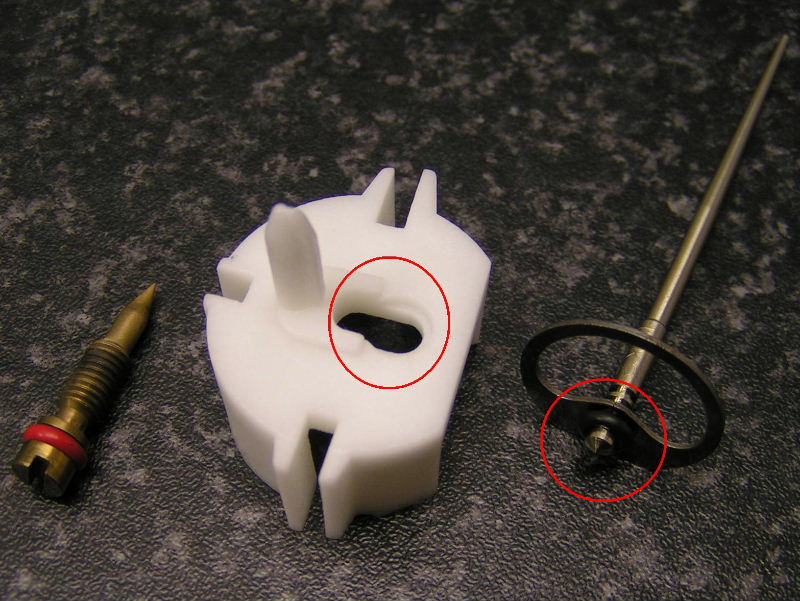
Rotax’s fix is a small O-ring on top of the needle, and a recess in the cap for the O-ring to fit in. This will ensure the needle is pressed down securely and it will not rotate that much and eliminate the excessive wear. Don’t confuse the red airjet O-ring shown left with the needle jet O-ring.
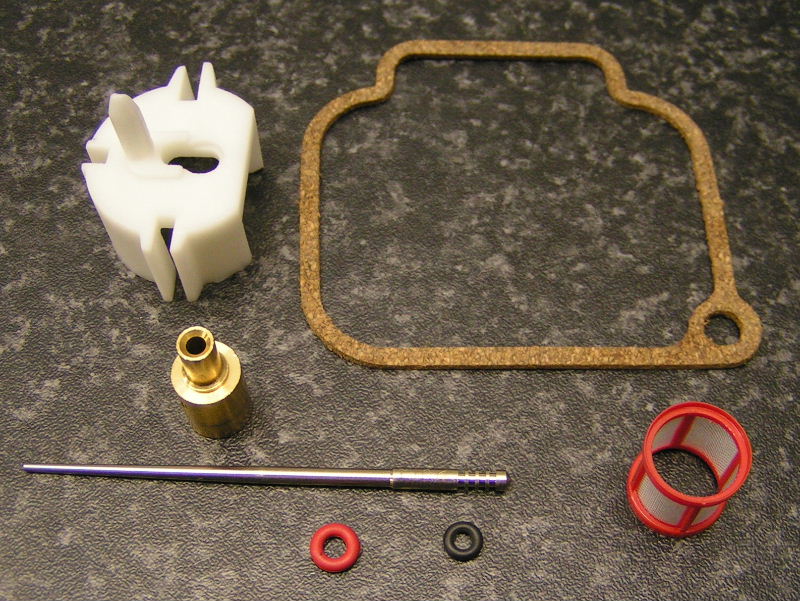
I purchased the following new parts, which typically wear out. (The big O ring for the carb top is not shown)
I assembled everything back as per literature link above.
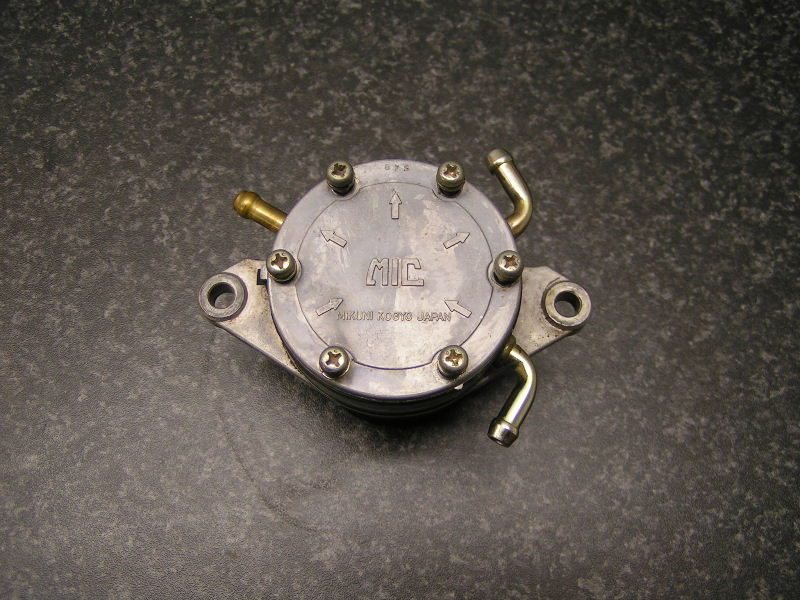
Next onto the Mikuni fuel pump, note the arrows shows the flow of fuel and the pulse port is on the bottom.
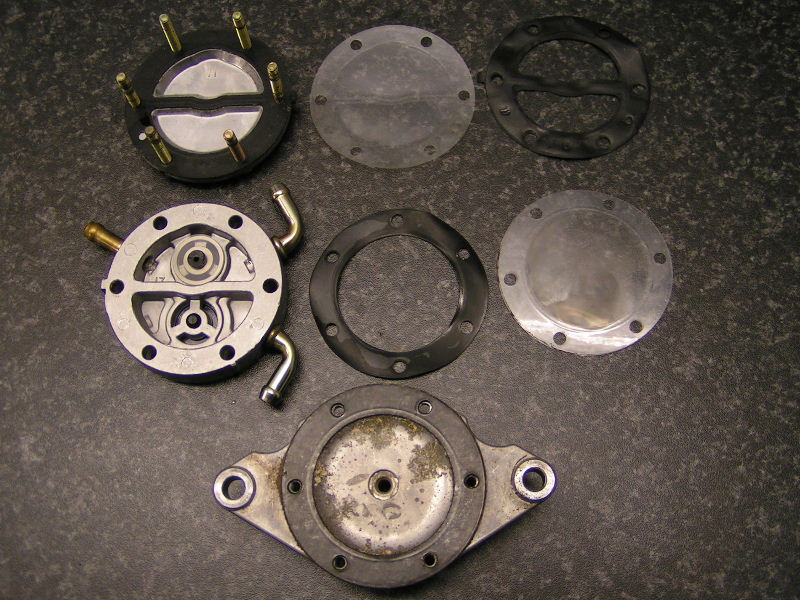
Here is the pump stripped and the pieces put in order from the top to right bottom. You can see it is a very simple pump, with no metal parts to wear out. Some of the membranes were a little warped.
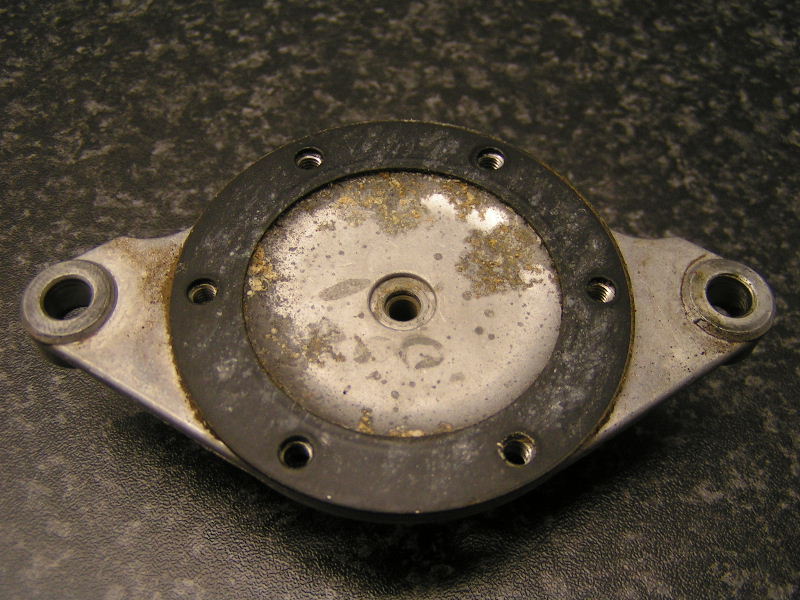
The inside bottom of the pump (pulse portion) was very dirty with a lot of gunk accumulated and corrosion. I was surprised to see this amount of gunk. Granted it is only air from the crank case via the pulse port in that bottom chamber, but still it looks bad. I cleaned everything and ensure the little 1/64 hole on the bottom of the pump in the pulse port 90 elbow is open.
For interest sake here is brief explanation how simple these pumps work:

Notice the arrows on the top cover. The pulse port on the bottom moves the membrane on the bottom back and forth. Fuel enters the pump on the bottom right, and gets sucked by the pulsing membrane through the one way valve (Red Circle) into the bottom chamber underneath the pump. The pulsing membrane then forces the fuel through the one way valve (Yellow Circle) back to top chamber. The top chamber then transfers the fuel under pressure through the 2 outlets to the carbs.
Anycase I purchased new membranes, gaskets and cleaned everything. Guess what Rotax do not sell the small transfer valve membrane parts. That is so stupid! The fuel pump can be as good as new if you replace all the membranes, since there are no metal parts that wear out. A new pump is almost 4 times the price of the gaskets +/- R1000! Anybody knows where I can find the membrane and parts for the transfer valves only, please post below.
The verdict, guys overhaul your carbs and fuel pumps when it is time. You might be surprised what you find. I was after 435 hours. One regularly hear people say: “These 503 motors are bullet proof, they can easily do 1000 hours or moreâ€Â. Rotax say 300 hours or 5 years TBO, though the 300 hours might be conservative I personally think a 1000 hours is stretching it. Granted my engine is 7 years old, but I’m sure glad I did not blindly believe those comments.I guess ignorance is bliss?
I hope you guys have found this info useful.
Regards
Rudi